ArcGIS: Generating CSB data shapefiles
This section provides instructions on how to export shapefiles of CSB data for specific participants, or for upload to an ArcGIS Online CSB Data Portal.
If your shapefile contains data from multiple participants, you will need to apply a selection query to create individual layers for each participant's data.
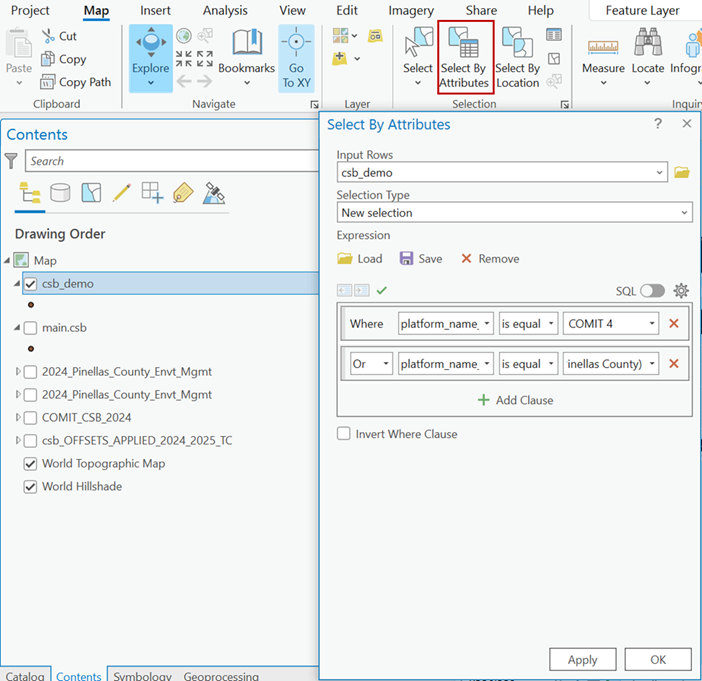
- While the CSB map layer is selected, navigate to the Selection section under the Map tab and click on 'Select By Attributes.' Set the Selection Type to New selection and set the clauses to: "Where platform_name is equal to [participant name]." If a participant has data from more than one vessel, add additional clauses using the 'Or' operator until all data for that participant are included in the selection. Click 'OK' to apply your selection.
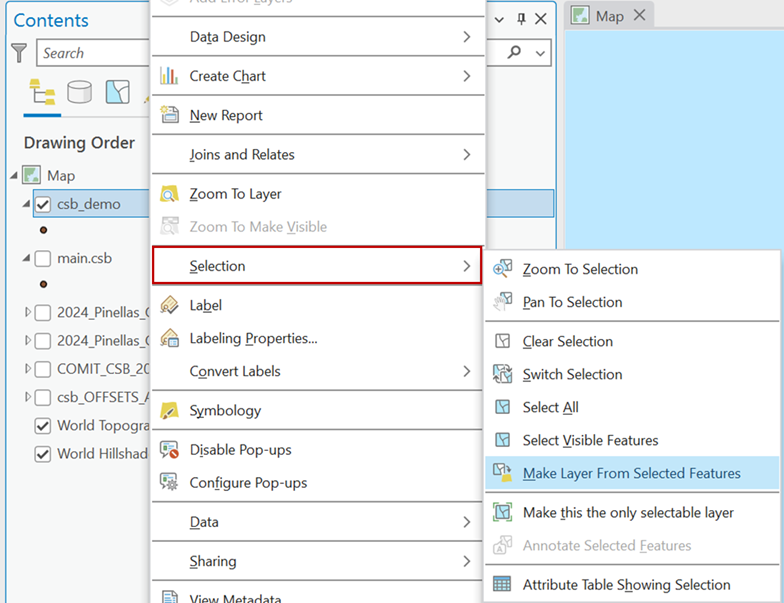
- Right click on the CSB map layer and under the Selection dropdown choose 'Make Layer From Selected Features.' Give the new layer an appropriate name to identify the participant and date range of the data.
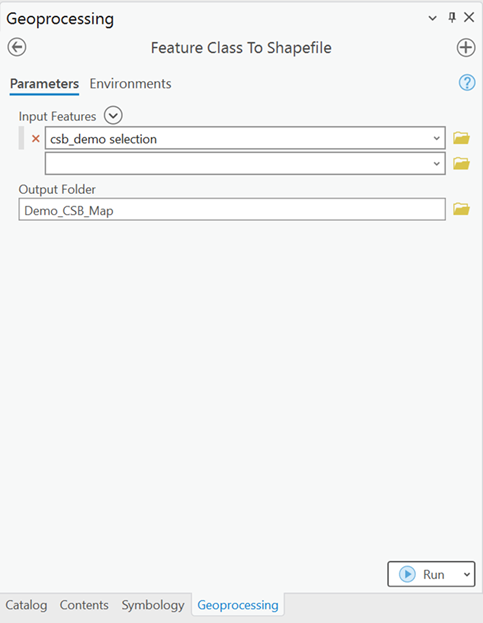
- You will need to convert this new feature class layer into a shapefile that can be sent to the participant. In the Geoprocessing pane, search for the 'Feature Class to Shapefile' tool. Add the layer you want to convert to Input Features and select an Output Folder. Click 'Run.'
You now have a shapefile of tide-corrected CSB data that can be zipped and sent to an individual participant or uploaded to an ArcGIS Online portal.