QGIS: Editing tide-corrected CSB data
For Trusted Nodes that prefer to use free and open-source GIS software, the following section describes how to edit tide-corrected CSB data using QGIS, and how to export shapefiles of data that can be shared with program participants.
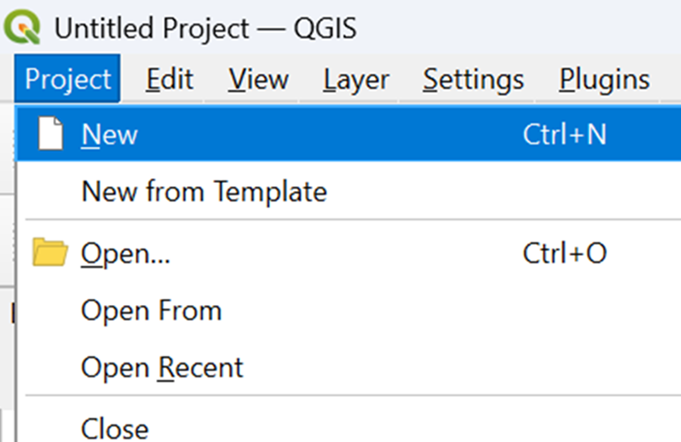
- Launch QGIS and select New under the Project tab to create a new project.
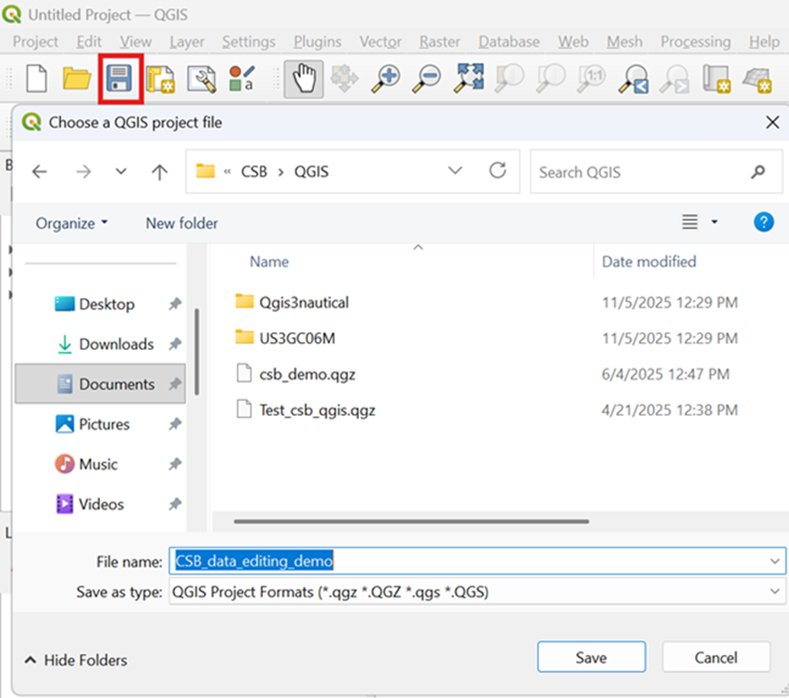
- Click the Save icon to name the project and save it in an appropriate location.
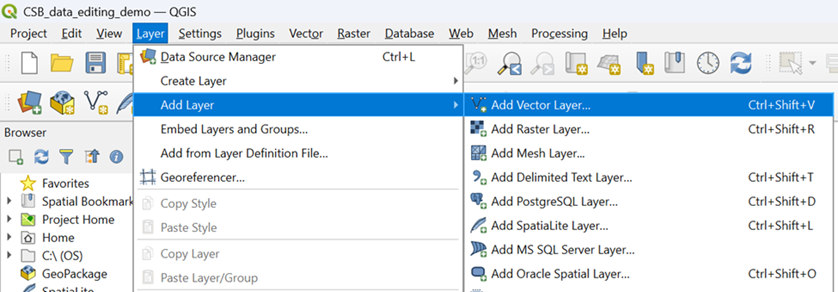
- Under the Layer tab, click on Add Layer and select Add Vector Layer from the drop-down menu.
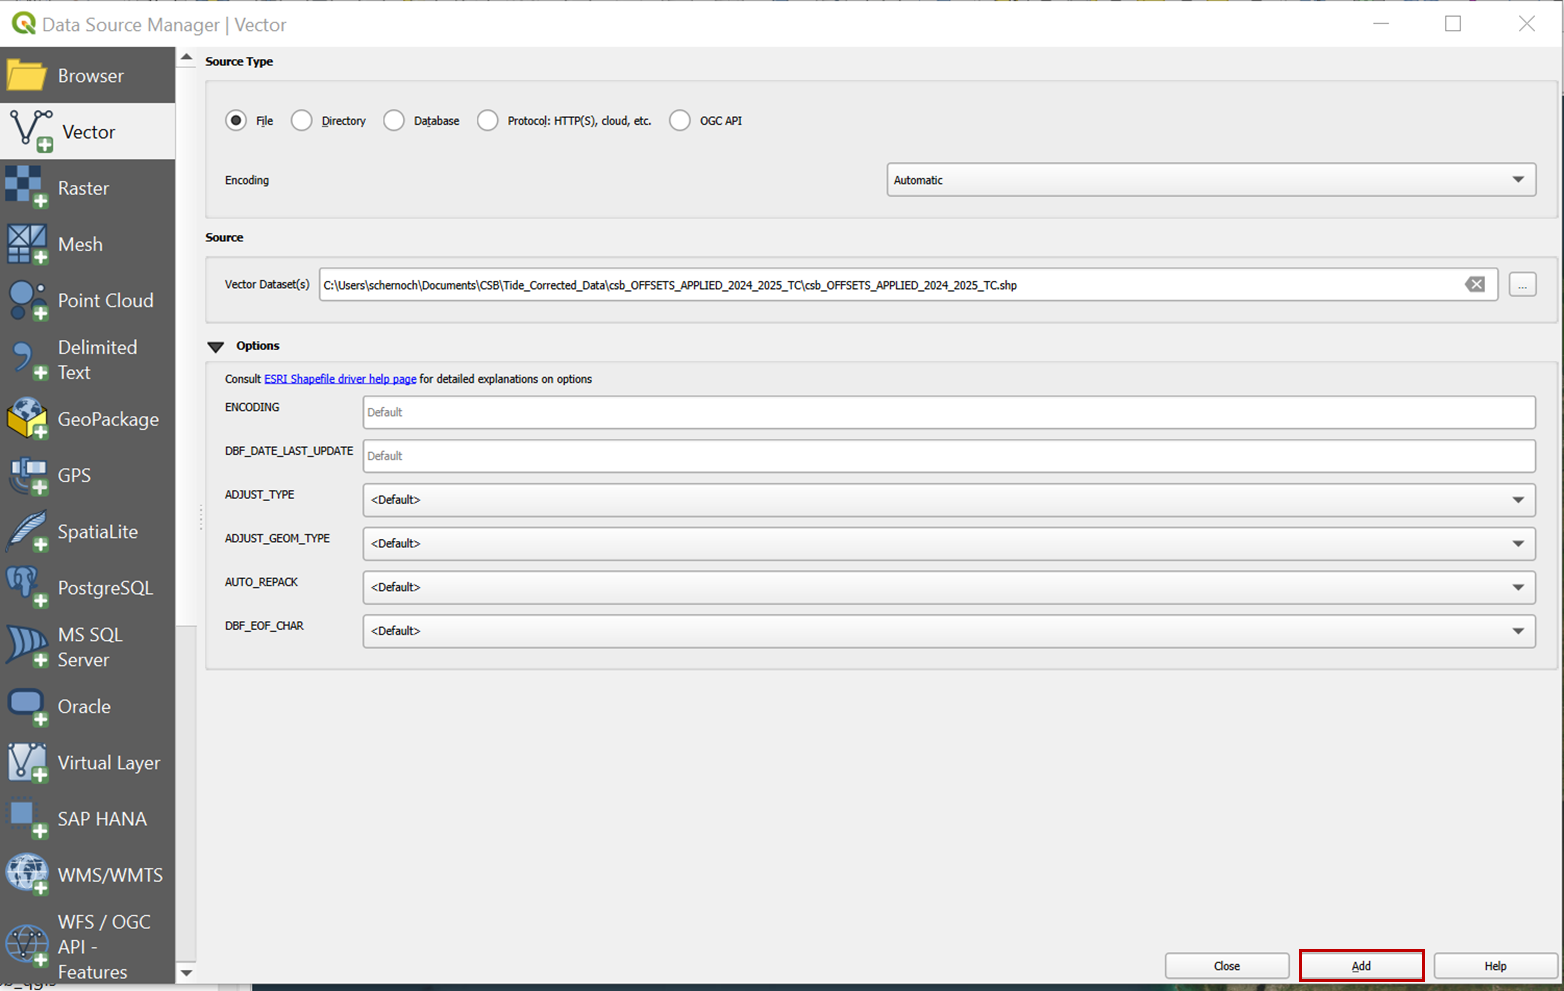
- In the Source / Vector Dataset box, navigate to the .gpkg of tide-corrected data that was output by Pydro. Click Add to import the data to the project.
- Right click on the vector layer and select Open Attribute Table.
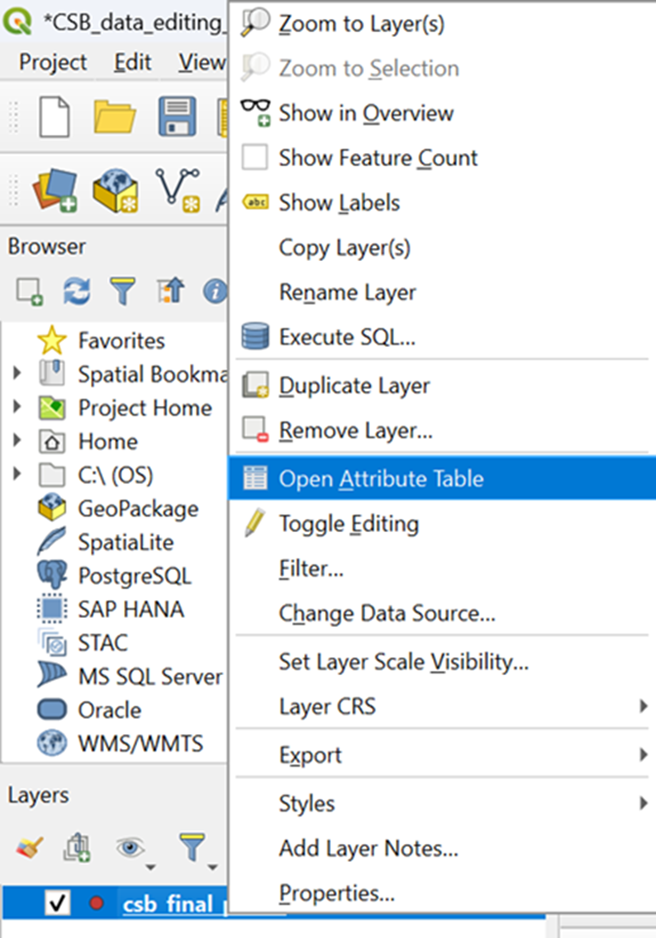
- The table should contain the columns: lat, lon, time, depth, and platform_name.

If your shapefile contains data from multiple participants, you will need to apply a selection query to create individual layers for each participant's data.
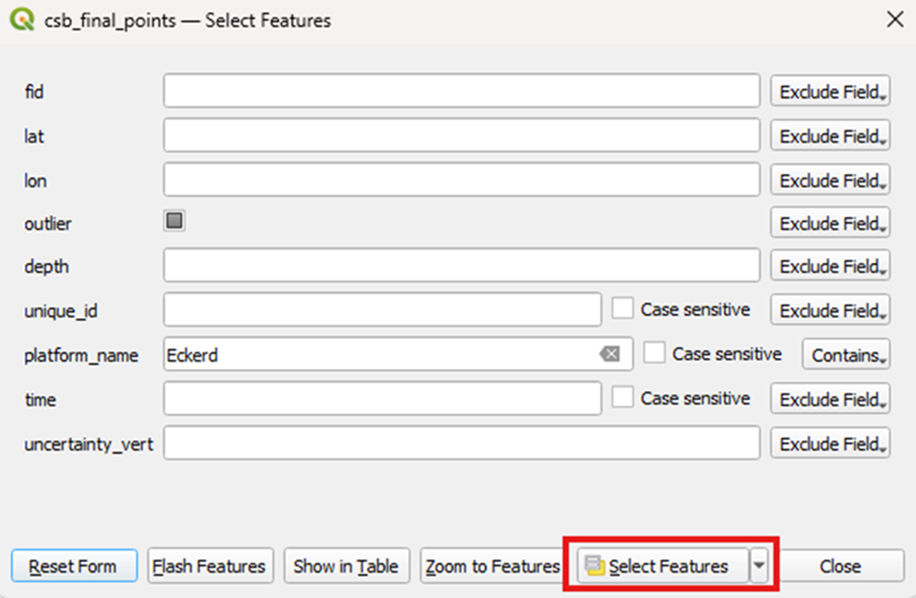
- Select the CSB vector layer and click on the Select Features by Value icon. To select all data points from an individual participant, enter an appropriate term into the platform_name box, and set the filter to Contains. Click on Select Features to apply the selection.

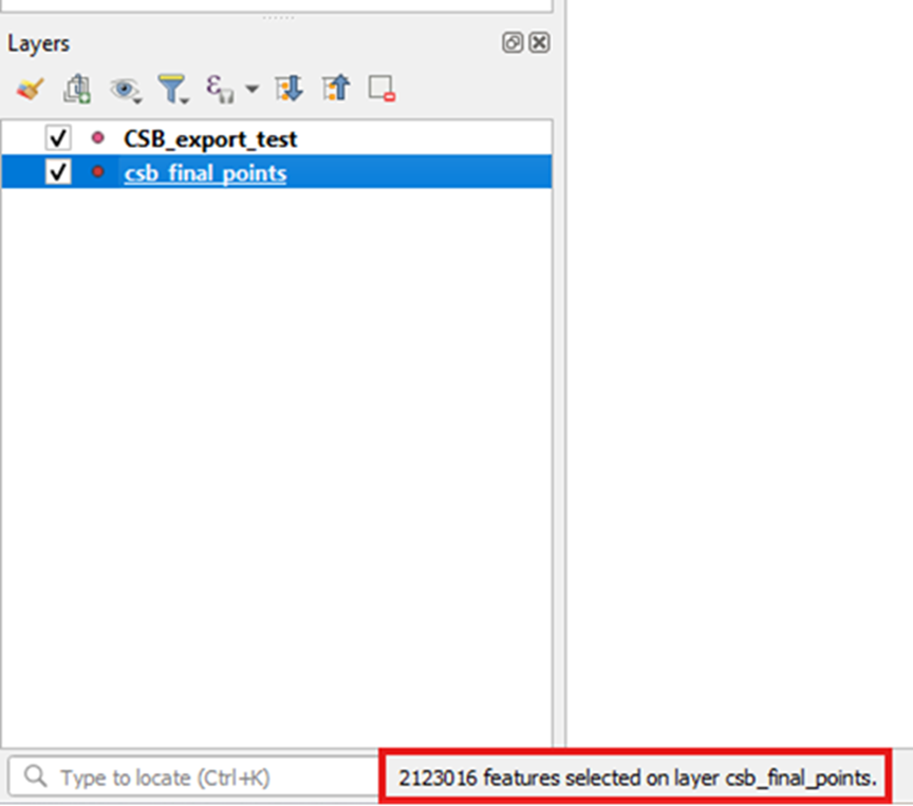
- A banner at the bottom left of the window should read out how many points were included in the selection.
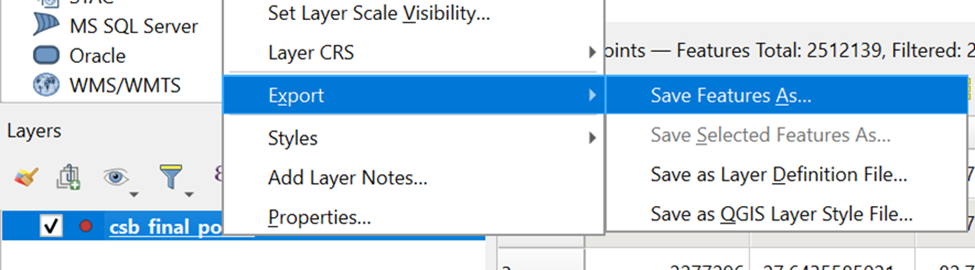
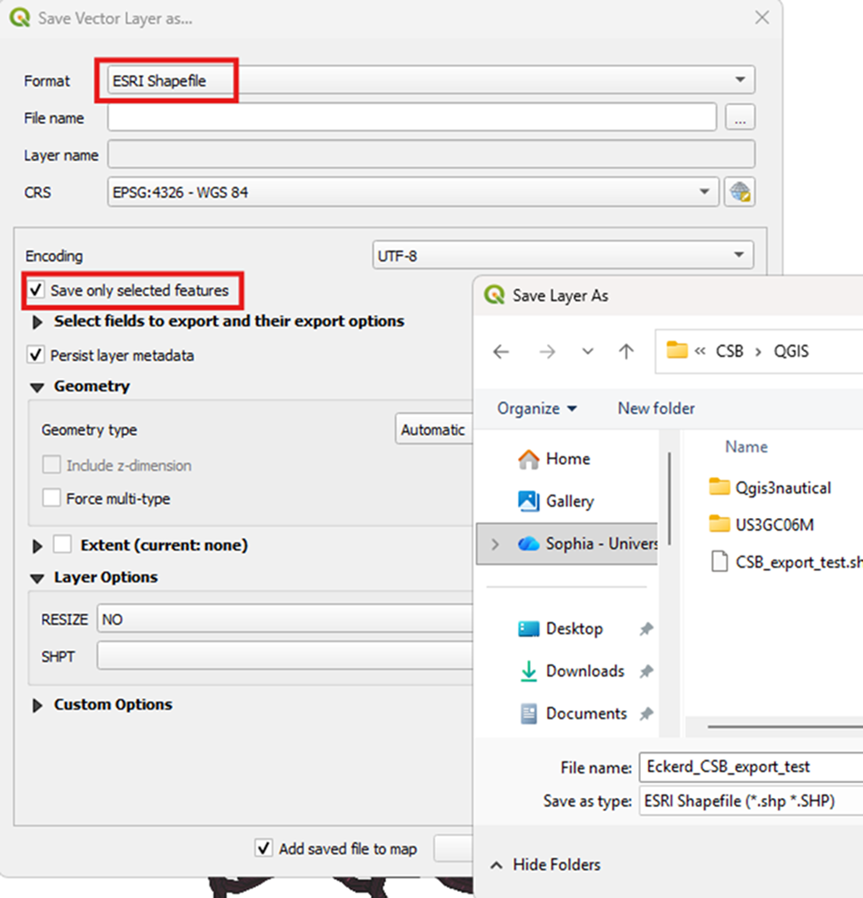
- Right click on the vector layer and under the Export drop-down menu, select Save Feature As.
- Select ESRI Shapefile as the Format and add an appropriate file name and location. Make sure to check the box to Save only selected features. Click OK to save.
You now have a shapefile of tide-corrected CSB data that can be zipped and sent to an individual participant.